Convert Fresh Yeast To Active Dry Yeast
Treneri
Apr 06, 2025 · 6 min read
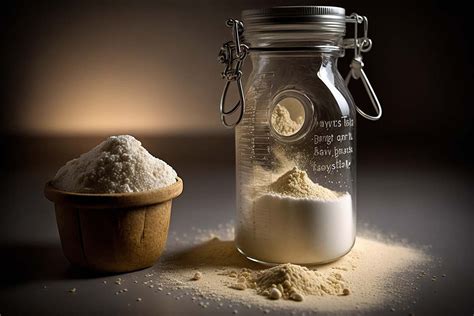
Table of Contents
Converting Fresh Yeast to Active Dry Yeast: A Comprehensive Guide
Fresh yeast, with its vibrant, almost cake-like texture, offers a unique baking experience. However, its short shelf life often presents a challenge. Active dry yeast, on the other hand, boasts a significantly longer shelf life, making it a pantry staple for many bakers. This comprehensive guide explores the process of converting fresh yeast to active dry yeast, outlining the steps, crucial considerations, and potential challenges involved. While a perfect replica of commercially produced active dry yeast might be difficult to achieve at home, this method allows you to preserve your fresh yeast for future baking projects.
Understanding the Differences: Fresh vs. Active Dry Yeast
Before diving into the conversion process, it's crucial to understand the fundamental differences between fresh and active dry yeast. This knowledge will inform your approach and expectations throughout the conversion process.
Fresh Yeast:
- Moisture Content: High moisture content (approximately 70%) is a defining characteristic. This high moisture content contributes to its short shelf life and requires refrigeration.
- Activity: Highly active, requiring less proofing time than its dried counterparts.
- Texture: Soft, creamy, and often slightly crumbly.
- Shelf Life: Extremely short; typically only lasts a few weeks, even when refrigerated.
Active Dry Yeast:
- Moisture Content: Significantly lower moisture content (approximately 8%) due to dehydration. This low moisture content is key to its extended shelf life.
- Activity: Requires rehydration before use to reactivate the yeast cells.
- Texture: Granular and dry.
- Shelf Life: Significantly longer than fresh yeast; can last for several months or even years when stored properly in a cool, dry place.
The Conversion Process: Turning Fresh Yeast into Active Dry Yeast
Converting fresh yeast to active dry yeast involves carefully dehydrating the yeast to reduce its moisture content. This process slows down metabolic activity, thus extending the yeast's shelf life. The key is to remove moisture gradually and evenly to prevent killing the yeast cells.
Step 1: Preparation and Crumbling
Begin by gently crumbling your fresh yeast into small, uniform pieces. This ensures even drying and prevents clumping during the dehydration process. Avoid using a food processor, as the heat generated can damage the yeast.
Step 2: The Drying Process: Options and Considerations
Several methods can be used to dehydrate fresh yeast. The choice depends largely on available resources and desired speed.
A. Air Drying: This method is the simplest but also the slowest.
- Procedure: Spread the crumbled yeast in a thin, even layer on a clean, absorbent surface, like parchment paper, in a well-ventilated area. Avoid direct sunlight, which can damage the yeast. Regularly turn the yeast to ensure even drying.
- Timeframe: This process can take several days, even a week, depending on humidity and temperature.
- Advantages: Simple, requires minimal equipment.
- Disadvantages: Slow, requires constant monitoring to prevent spoilage.
B. Oven Drying (Low Temperature): This method offers faster drying times compared to air drying.
- Procedure: Preheat your oven to the lowest possible setting (ideally below 100°F or 38°C). Spread the crumbled yeast thinly on a baking sheet lined with parchment paper. Leave the oven door slightly ajar to allow moisture to escape.
- Timeframe: Several hours, depending on your oven's efficiency and the thickness of the yeast layer. Monitor closely to prevent overheating.
- Advantages: Faster than air drying.
- Disadvantages: Requires careful monitoring to prevent overheating and killing the yeast.
C. Dehydrator: If you have a food dehydrator, this is arguably the most efficient method.
- Procedure: Follow the manufacturer's instructions for dehydrating yeast. Ensure the temperature is set low to prevent damage to the yeast cells.
- Timeframe: Variable depending on the dehydrator model, but generally faster than air drying or oven drying.
- Advantages: Efficient and relatively quick drying.
- Disadvantages: Requires a food dehydrator.
Step 3: Storage
Once the yeast is completely dry, it should be brittle and easily crumble. Improper storage can compromise the shelf life even after successful dehydration.
- Container: Store the dried yeast in an airtight container. Glass or food-grade plastic are ideal.
- Environment: Store in a cool, dark, and dry place. Avoid fluctuating temperatures and humid environments.
Testing the Viability of Your Homemade Active Dry Yeast
After the dehydration process, it's crucial to test the viability of your homemade active dry yeast before using it in baking. This simple test will determine if the yeast cells have remained active.
The Yeast Activation Test:
- Dissolve: In a small bowl, dissolve 1 teaspoon of your converted active dry yeast in ¼ cup of warm water (around 105-115°F or 40-46°C). The water should be comfortably warm, not hot.
- Observe: Let it stand for 5-10 minutes. If the yeast is active, you should see a foamy head forming on the surface of the water. The more foam, the more active the yeast.
- Assess: Minimal or no foam indicates the yeast may be inactive or dead. This could result from improper drying or storage.
Tips and Troubleshooting
- Temperature Control: Maintaining a consistent, low temperature throughout the drying process is paramount. Overheating will kill the yeast.
- Even Drying: Ensure even drying to prevent some portions from becoming overly dry and inactive while others remain moist and prone to spoilage.
- Storage: Proper storage is just as important as the drying process. An airtight container in a cool, dark, and dry location is essential.
- Testing: Always test the viability of your converted yeast before using it in a recipe.
Limitations and Expectations
It's important to acknowledge that home-converted active dry yeast might not perfectly mirror commercially produced active dry yeast in terms of performance and shelf life. Commercially produced yeast undergoes rigorous quality control and specialized dehydration processes. However, this method provides a practical way to preserve fresh yeast, extending its usability and reducing waste. Expect a somewhat shorter shelf life compared to commercial products.
Conclusion: Preserving the Flavor of Fresh Yeast
Converting fresh yeast to active dry yeast offers a rewarding way to preserve the unique qualities of fresh yeast and extend its usability beyond its natural short shelf life. While the process demands patience and attention to detail, the ability to utilize fresh yeast even when time is of the essence makes the effort worthwhile. By following the steps carefully and adhering to the crucial considerations outlined in this guide, you can successfully convert fresh yeast into a usable, albeit possibly less long-lasting, form of active dry yeast, ensuring you can enjoy the superior flavor and texture of fresh yeast in your baking projects throughout the year. Remember to always test your converted yeast for viability to ensure successful baking results.
Latest Posts
Latest Posts
-
5 To The Power Of 20
Apr 08, 2025
-
8 Ml Equals How Many Teaspoons
Apr 08, 2025
-
How Many Seconds In A Second
Apr 08, 2025
-
How Many Days Is 16 Months
Apr 08, 2025
-
2 2 Pounds Is How Many Grams
Apr 08, 2025
Related Post
Thank you for visiting our website which covers about Convert Fresh Yeast To Active Dry Yeast . We hope the information provided has been useful to you. Feel free to contact us if you have any questions or need further assistance. See you next time and don't miss to bookmark.